
While we’re talking about different basic stitches in crochet, I thought I might go off on a little tangent, especially for those of you who are excited to get started on Colorwork. Since we ARE working on BASIC stitches in crochet, this entry will take you through the BASICS on changing colors. We’ll focus on changing the color for each row here. When we get a little farther along, I’ll go over changing colors in the middle of a row.
If you’ve been reading Design it Yourself, we just talked about Colorwork and what exactly it is. The short version is that Colorwork is the use of multiple colors in a knit or crochet work.
When you’re designing there are several things to take into account, but when you’re actually doing Colorwork, there are some more practical issues that come up. For example: What in the world do I do with all these strings!?
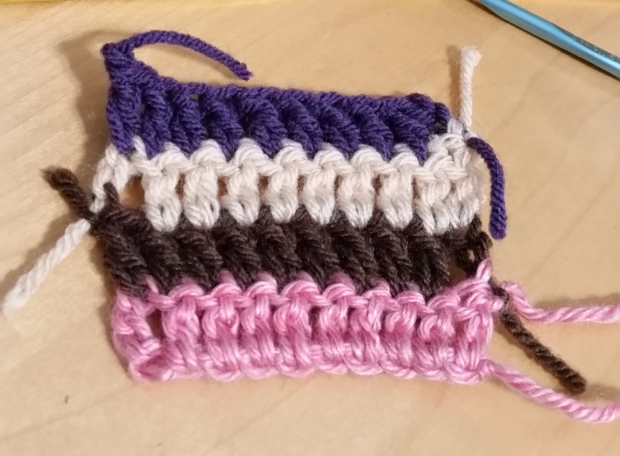
First thing to do, don’t let yourself get to that stage! Rather than tying your yarn together and leaving it to chill out the end, just fasten off the first color and use a slip stitch to move onto the next one. Like so:


Once you have the slip stitch in place, make your turning chain (your pattern will tell you how many to chain, I’ll be chaining 3 to turn a double crochet row).

When you turn your work, lay the “tails” across the top of where you will be working. This will let you work over them.

Make your stitch and wrap it around the tails as your work and you’ve successfully hidden those pesky yarn ends.

It may not be the fanciest way to change colors, and goodness knows that Pintrest is FULL of ways to join yarn for knitting or crochet, but it gets the job done and it looks good when you’re finished.

One thought on “Crochet 101: Tuck Tails, The EASY way”